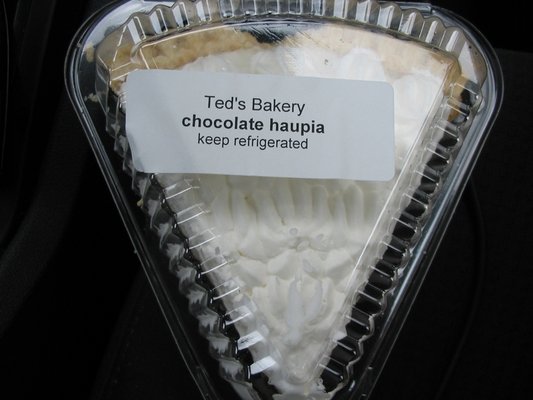
Sunday, February 6, 2011

Macarons and Meringues

Lately I have been absolutely obsessed with macarons.  It all began with a trip to Paulette's... where I learned that a real macaron is made with only egg white, sugar, and almond flour.  No wheat!!!  Amazing!!!  Anywhoooo...  they are quite delicious and happily fulfill my sweet needs.  Of course I can't afford Paulette macarons everyday, so I've been munching on these little guys from Trader Joe's.  They are wonderful!!! :D!  

Then I thought, let's make macarons!!! 
Then I learned that macarons are kind of difficult to make...  French technique, blah blah blah... So, I decided to start off with meringues! 


Chocolate chocolate chip meringues (thank you myrecipes.com)

Ingredients: 
-1/2 cup powdered sugar
-1/3 cup unsweetened cocoa
-5 large egg whites
-1/4 tsp cream of tartar
-2/3 cup granulated sugar
-1 tsp vanilla extract
-semisweet chocolate chips


Directions:
1.  First, sift together the powdered sugar and cocoa.

2.  Gather together the egg whites and cream of tartar into a large bowl and beat until soft peaks form.
I whipped my egg whites by hand :(   
After my experience, I would highly suggest embracing the 21st century and investing in a mixer.

3.  Gradually, meaning one spoonful at a time, incorporate in the granulated sugar and powdered sugar/cocoa mixture.  Continue to beat until stiff peaks form
**Yeah... my peaks totally went flat here and the batter became glue-like.  Roomie says that I over beat the egg whites :(  I will definitely use a mixer next time.**    

4.  Fold in the vanilla and chocolate chips.

 5.  In nice tablespoon sized mounds, drop the dough onto a prepared cookie sheet. 
**Okay.  So, I tried to get a little fancy here and pipette out the dough via a pastry bag (aka. a ziploc bag with corner cut off).  Yeah, I think I learned this one from Rachel Ray.  Anywhooooo... I think this would have worked better if the dough was firmer. 

Hahahaha... cookies that look like poo!  Yes, I am 5.   
I tried to hide the poop shape of the cookies with chocolate hats.  I think this actually helped... or now I have poop shaped chocolate cookies!!! 

6.  Bake at 300F for 30 minutes, rotating the rack at 15 minutes.  Turn off the oven, then allow them to dry in the closed oven for 90 minutes.     
**I had to bake mine for about 45 minutes to get them nice and firm.**

The final product!
Yeah.  My meringues were far from perfect, but they were quite delicious and light!!! 
The chocolate chips really helped make this cookie delicious and I'll be sure to add it in the future.
Stay tuned for macarons trial #1!   

Sunday, November 14, 2010

Chocolate Chip Cookies (Part 1) -- Bob's Red Mill

Yep, so here's attempt #1 at Chocolate Chip Cookies.
I absolutely love cookies, especially the chocolate chip ones, and miss them dearly. 
There are numerous cookie mixes out there.  I found this particular mix at Whole Foods and just could not resist.  Bob just looks so trusting with his white beard and old man glasses, right?  Although, I'm not a huge fan of his hat. 
Ingredients:
-1/2 cup butter
-1 egg
-2 Tbsp. water
Directions:
1.  Cream the butter with an electric mixer until soft.
2.  Add the egg and water to the butter and blend together for 30 seconds.
3.  Once the wet ingredients are thoroughly combined, add in the cookie mix and blend for 2 minutes.
(The directions note that the dough will look dry, but should combine when pressed together -- you can see what my dough looked like below).
Hm... not quite the chocolate chip cookie dough of my youth, but maybe it'll look better after it's baked?
4.  Shape dough into 1.5 inch balls and place on baking sheet.
My roommate was grossed out by the sand-like grainy texture of the dough, so I tried to shape them into little heart shaped cookies -- I hope that makes them taste better!  :)
5. Bake for 15 minutes at 350F or until the edges are brown.
Tada!  What happened to the hearts?
Initial assessment -- Not very good.
The positive:  Although the dough was very grainy, the baked cookies were not.  
The negative:  Not enough chocolate chips.  This is going to sound strange, but they tasted like very "adult" cookies... very "Bob" cookies... not too sweet or ooey gooey.  In addition, there was a strange after taste.  In all, it failed the roommate test (aka. my gluten-loving roommate would not eat more than one).

In all the initial cookies were a disappointment, but then my roommate looked up reviews online (thank you Amazon) and discovered how they could be better!

Ingredients (continued):
-cinnamon
-gluten-free chocolate chips (about 1/4 to 1/2 a bag)
-gluten-free vanilla extract
-gluten-free oats
Directions (continued):
3b. After preparing the base mix (above), add to it some cinnamon, gluten-free chocolate chips, gluten-free vanilla extract, and gluten-free oats

Okay, I'm not a cook or a baker, so I just threw in a bunch of stuff.  How could chocolate and vanilla not make something taste better?  I was a little skeptical about the cinnamon, but really liked the final product.
Okay, yeah, I know what you're thinking, it looks like a giant horse turd.  However, the oats really help to mask the strange texture of the dough.  Just be sure to get the gluten-free type!   
Tada!  Much, much better!
The modified cookies were much, much better and passed the roommate test. 
The extra chocolate made these cookies actually taste like chocolate chip cookies.  The oats hid the funny texture and the cinnamon masked the after taste.  :)!     

In the future, in addition to the other modifications, I think I'll add more butter -- Right out of the oven, these cookies were delicious, nice and firm out the outside with a little give in the center.  The day after, they were biscotti hard!  Like, leave these cookies in your coffee for half an hour hard.  Like, "OMG did this cookie just chip my tooth" hard.  Yeah, it's all still a work in progress.

A review of the Bob's Red Mill Cookies (without modification)
-Price: $5.00 - $6.00?  
-Convenience:  A simple box mix.  Butter, eggs, water -- nothing exotic here. 
-Taste:  Not very sweet or chocolatey with a strange after taste that I cannot place.
-Texture:  Not grainy.  Pretty nice fresh out of the oven, but overall too hard once they cool.

-Overall:  ^.^  ^.^ 
(2 out of 5 happy Asian smiles) -- I really did not care much for these cookies, but they were pretty good with the modifications.  I'll definitely keep working on it until I find a recipe that is just right! 


Pasta (Part 2) -- Quinoa Pasta

I found this new quinoa pasta at Bristol Farms last week and decided to try it out.
Admittedly, I was very skeptical.  The pasta is bright (borderline highlighter) yellow and I have never eaten quinoa in my life, but anything has to be better than that brown rice pasta I tried last week, right?

Education corner:
Quinoa (pronounced “keen-wa”) is a seed originally grown in South and Central America, with some of the crop now grown in Canada. Quinoa has a high protein value... It is also an above average source of vitamins and minerals. Quinoa is free of gluten and is a good source of fiber.  (www.naturespath.org)
Hm... okay...


Pasta prep:  Nothing new here, like any other box of dry pasta -- bring water to a boil, put in noodles, wait for the water to boil again, stir and cook for 5-6 minutes, tada! 
A few differences:  This pasta is very sticky, so next time I will definitely follow the directions and add some oil to the water and stir thoroughly after dropping the noodles into the water (oops -- almost created one giant, box sized, pasta noodle).  In addition, the water gets very milky and the noodles need a little extra rinsing once they are done.

LUNCH! 
A review of the quinoa pasta
-Price:  $2.39! Woot! 
-Convenience:  As simple as any other box of dried pasta -- excellent!    
-Taste:  I thought it smelled a little different, but the taste was right on.  Ate it all up with the eggplant marinara I made earlier. 
-Texture:  Unlike the rice noodles the week before, this pasta was nice and al dente, just the way I like it!  

-Overall:  ^.^  ^.^  ^.^  ^.^  ^.^
(5 out of 5 happy Asian smiles) -- this pasta was soooooo much better than the brown rice pasta.  Hm... I think I'll make some meatballs next to go with this meal. 


Monday, November 8, 2010

Chocolate Haupia Pie

The task this week:  Ted's Bakery Chocolate Haupia Pie.

"Haupia is a traditional coconut milk based dessert often found at luaus and other local gatherings...  Although technically considered a pudding, the consistency of haupia closely approximates gelatin dessert and is usually served in blocks like gelatin."  (Wikipedia)  

 As I said before, in Hawaii we typically take something that is delicious (haupia) and then make it even more delicious (in this case by adding chocolate and then stuffing it all in a pie).

STEP 1:  PIE CRUST

Did I mention how sweet my roommate is?  Well, she is really sweet and bought this excellent pie crust on Amazon.  It got great reviews (4.6 out of 5 stars), so we decided to give it a go.


Additional Ingredients Needed
-1/4 tsp baking powder
-2 tbsp sugar (optional)
-10 tbsp cold, unsalted butter cut into small pieces
-10 tbsp butter-flavored veg. shortening cut into small pieces
-2 eggs
-2 tbsp cider vinegar


(1) Mix together the dry ingredients:  pie mix, baking powder, and sugar
(2) Cut up the butter and shortening into small cubes and add to the dry mix
(3) Mix together the wet ingredients:  eggs, water, and vinegar.
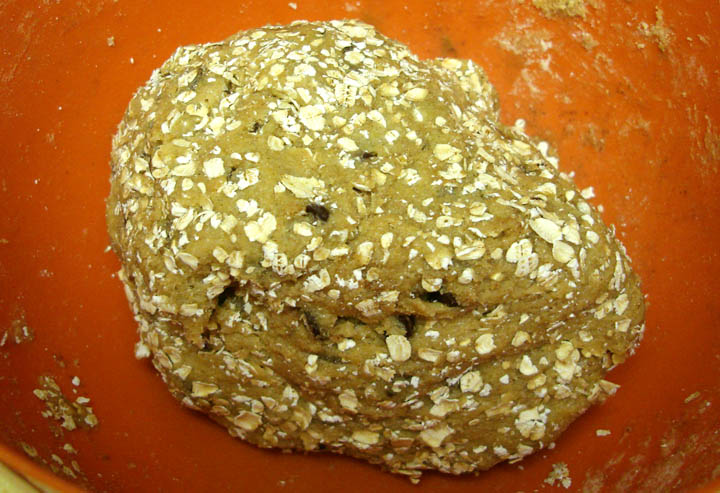
(4) Combine the wet ingredients with the mix.
(5) Form the dough into a ball and chill in the fridge for 1 hour -- this chill step is essential, the dough is extremely soft and difficult to work with prior to chilling.

One box of pie mix = Four 8" crusts
We only wanted a base, so we split off 1/4th of the dough and froze the rest for later.

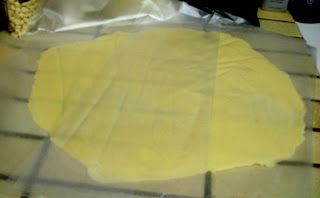
(6) Roll the dough out between 2 layers of plastic wrap... okay, so I don't have a rolling pin, a container of quaker oats works also

(7) Transfer the circle of dough to a pie pan
 *Note:  You really have to work fast or the dough begins to melt on you.
In the future I think I'll cool down my counter prior to rolling out the dough.


 (8) Prick bottom and bake for 12-15 minutes at 425F.

My roommate is obsessed with the idea of mini pies.  So, here's a picture of them (pie and mini pie) in the oven.


STEP 2:  PIE FILLING
This recipe was another great find on the AllRecipes website.

Ingredients:
-1 cup milk
-1 (14 oz) can of coconut milk
-1 cup white sugar
-1 cup water
-1/2 cup cornstarch
-1 cup semi-sweet chocolate chips

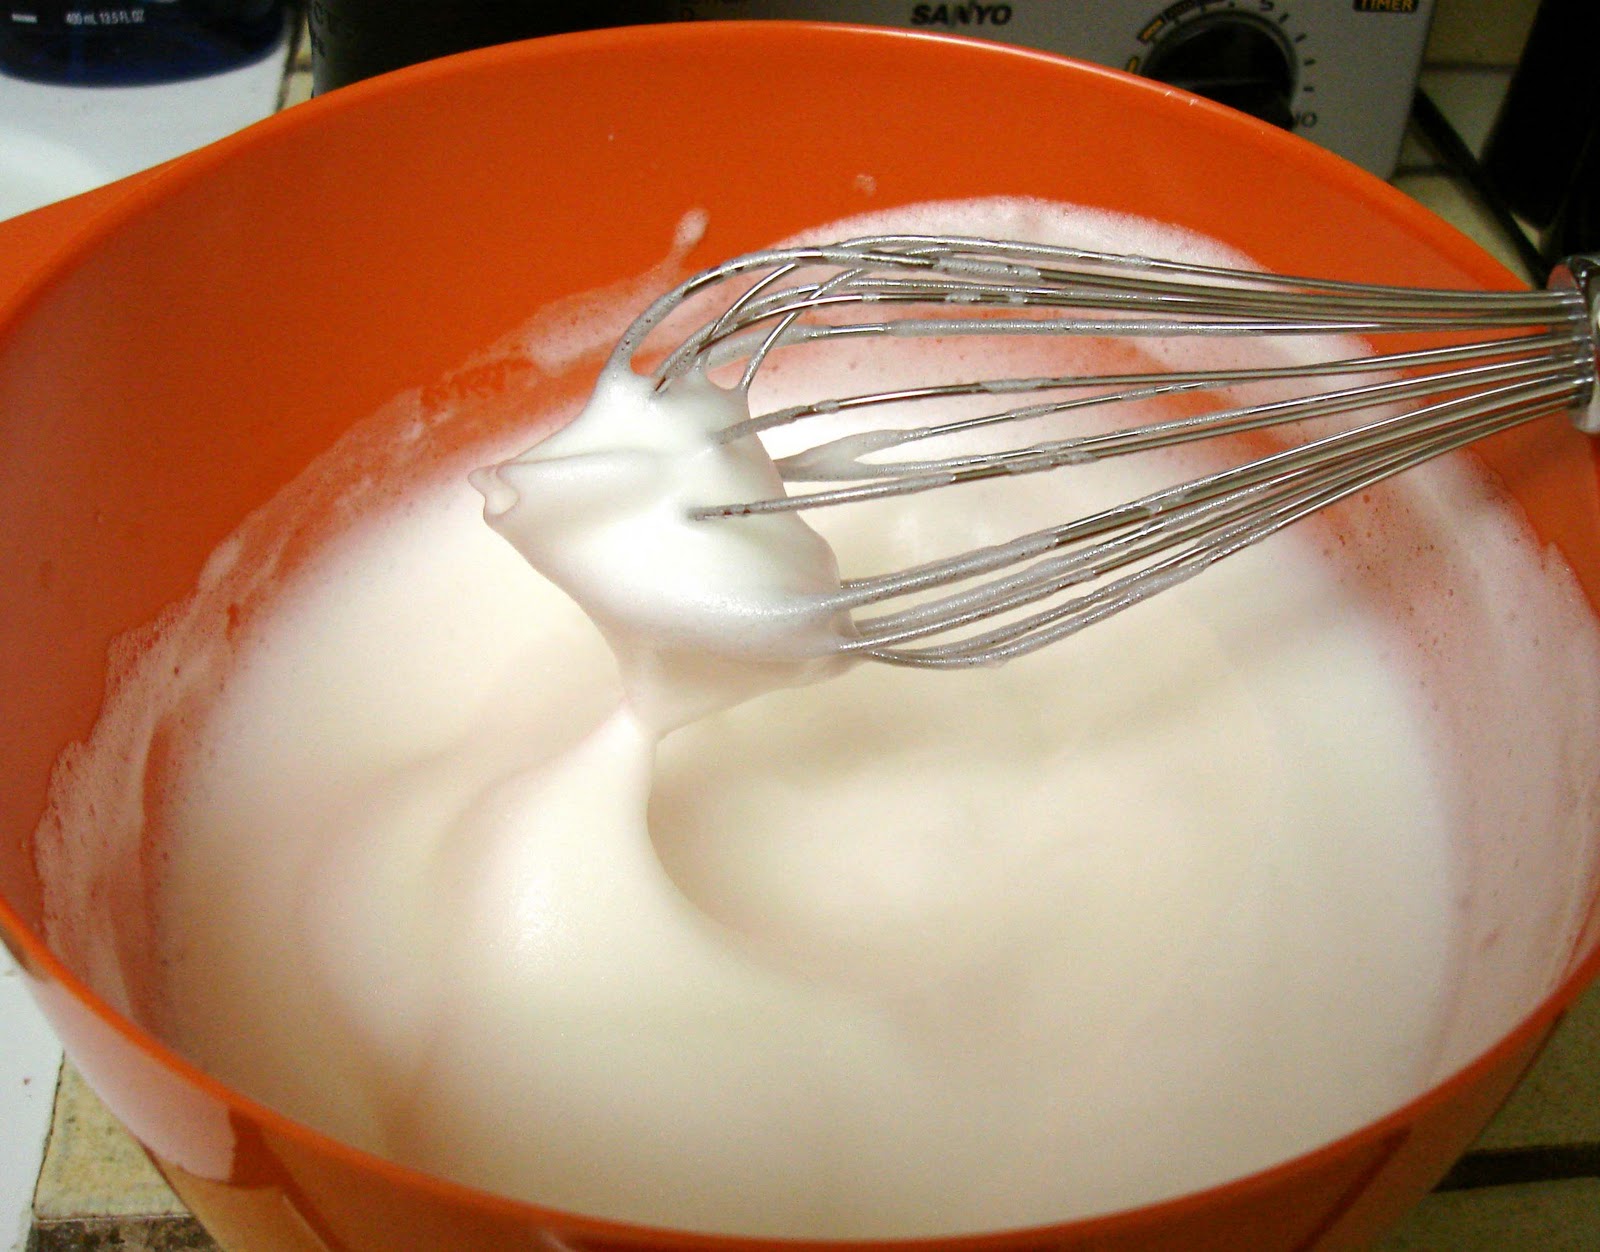
My roommate stirring -- Thanks roomie!
(1) On low/medium heat, whisk together the milk, coconut milk, and sugar.  Gradually bring this coconut mixture to a boil.
*Stir, stir, stir!  This burns very easily.
(2) In a separate bowl dissolve the cornstarch in water.  Once the coconut mixture comes to a boil, gradually stir in the cornstarch water.  After all the cornstarch is added, continue to stir for 3 minutes.
CHOCOLATE!!!!! :)))))
(3) Microwave the chocolate chips for about 1-2 minutes (just until they melt).  Divide the coconut pudding into 2 bowls, then stir the chocolate into one of bowls of coconut pudding. 
(4) Pour the chocolate coconut mixture into the cooked pie crust and spread evenly.  Then, pour the white coconut pudding on top of the chocolate layer and spread evenly.
(5)  Place pie in fridge for about 1 hour.
 

TADA!  All Done!
All in all, this was a really simple recipe that looks and tastes great!!!

A few more pictures + the pie crust review:
A review of the pie crust:
-Price:  $0.91/ crust -- really awesome!
Price math:  
Pie crust 6 pack on Amazon: $21.91
Price for one box (4 crusts):  $3.65
Price for one pie crust: $0.91   
-Convenience:  None of the ingredients added to the pie crust were difficult to find.  In all, it was a fairly simple pie crust to make.  However, I definitely need to chill the dough more in the future. 
-Taste:  Buttery and delicious.  Perfect for this particular recipe.  I imagine this would go well with really any fruit pie.
-Texture:  Flaky due to the high Crisco and butter content.  Surprisingly, the crust was not grainy at all!


-Overall:  ^.^  ^.^  ^.^  ^.^  ^.^
(5 out of 5 happy Asian smiles)

I really loved this pie crust and will be using it this Thanksgiving to make some delicious pumpkin pie!  Yum yum! 

A practice run of my roommate's mini pumpkin pies!  I can't wait for Thanksgiving!


Saturday, November 6, 2010

Butter Mochi

In Hawaii we frequently take something traditional (like mochi, a delicate sweet Japanese treat) and stuff it will more deliciousness (in this case butter) -- thus we have the local favorite:  Butter Mochi! 
 
I have been craving some good butter mochi for awhile and found this recipe on the All Recipes website.


Ingredients: 
-1 box mochiko (glutinous rice flour)
-2 1/2 cups white sugar
-1 teaspoon baking powder (gluten free)
-1/2 cup butter, melted
-3 cups whole milk
-5 eggs
-1 teaspoon vanilla extract


Directions:
(1)  Mix the wet ingredients together:  milk, eggs, and vanilla
(2)  Mix the dry ingredients together:  rice flour, sugar, baking powder. 
(3)  Pour the wet ingredients into the dry ingredients.
(4)  Melt the butter and stir it into the batter.
(5)  Bake for 1 hour  at 350F.

Tada!  Super easy and super delicious! 
The recipe I found called for coconut, but I like mine pure and buttery.
While this recipe was great, my roommate and I both agreed that it lacked the "oozing butter" we were used to (seriously, the paper towel should be translucent in this picture). 
We are going to try and track down some family recipes.
 
Keep posted for SUPER BUTTER MOCHI!  

Sour Cream Coffeecake

I used to think that I could only find gluten-free baked goods at Whole Foods.  However, recently I have been seeing gluten-free brownies, muffins, cupcakes, and cookies offered at Bristol Farms and Ralphs.

I found this little beauty in Bristol Farms.

I love coffeecake.  So I was thrilled when I found this!!!


A review of the cake
-Price:  $7.50!!!  Yes, this is how much I love coffee cake.
-Convenience:  Open the package and eat -- doesn't get much simpler than this.
-Taste:  Delish!  Not too sweet, just nice.
-Texture:  The cake was moist with a bounce/spring to it.  There were also walnuts in it (not a big fan of nuts in my cake, but it was okay).  


-Overall:  ^.^  ^.^  ^.^  ^.^  ^.
(4.5 out of 5 happy Asian smiles) -- this cake will soon be going, going, gone! 

Pasta (Part 1) -- Brown Rice Pasta

Lately, I have been craving pasta, specifically warm spaghetti... yummo!    

I know there are many pasta choices out there, but I found this little gem while walking up and down the aisles at the local Nijiya Japanese market and decided to give it a try -- seriously, it is the "industry's first"... why wouldn't I want to try this.

Unlike the boxed pasta I typically buy, these noodles were vacuum sealed and not dehydrated.  Within the larger bag, there were 2 individually portioned packets of vacuum sealed noodles. :)   
 The instructions were very simple:
(1) Boil water and place noodles in water
(2)  Boil noodles for 1-2 minutes
(3)  Rinse noodles in cold water

To accompany the noodles I decided to prepare some eggplant marinara, I found a simple but delicious looking recipe on the MyRecipes website.
I absolutely adore eggplant.  I purchased some great ones at the local farmer's market... then promptly forgot about them in the fridge for a few weeks.
In short, I cut out whatever survived, bathed these bits in garlic and olive oil, and then roasted them in the oven for 30 minutes.


As the eggplant roasted, I prepared the rest of the sauce.
(1) First in the pan:  onions and garlic.
I cooked the onions until there were a little limp and translucent.


(2) Second in the pan:  crushed canned tomatoes, basil, sugar, oregano, and the roasted eggplant.
(Can't help but feel this may have all been tastier with fresh tomatoes -- oh well, next time).


The final product!
Yeah, so I'm really not much of a cook and this has been verified with this meal.
The sauce definitely lacks something (salt?).
Oh well, it was enough the curb my appetite.
I think tomorrow I'll just throw some cheese on it, because as everyone knows, cheese makes everything better.


A review of the noodles.
-Price:  $5.00-6.00?  I threw away the receipt, so I can't remember the exact price.  As with all gluten-free products, it was a little on the expensive side (especially for 2 servings), but nothing too high.
-Convenience:  With the individually wrapped packages, these noodles are ideal for single meals.  The noodles cooked ridiculously fast.     
-Taste:  The taste was surprisingly good, just like "real" noodles.
-Texture:  Okay, my biggest beef with these noodles was the texture.  Perhaps I overcooked the noodles (boiled them for closer to 2 minutes, than 1), but these noodles were very soft and fell apart easily when trying to pick them up... not very al dente at all.
-Overall:  ^.^  ^.^  ^.^ (3 out of 5 happy Asian smiles) 

Nijiya Market
2130 Sawtelle Blvd # 105
Los Angeles, CA 90025